Installing a high-performance printer like the HP LaserJet Enterprise M605 isn’t just a routine task—it’s the foundation for reliable, professional printing in any office environment. Designed for speed, durability, and consistent output, the M605 requires careful setup to ensure optimal performance. This guide walks you through every step, from unboxing to advanced configuration, making your printer ready for daily operations with minimal hassle.
Unboxing and Preparing the Printer
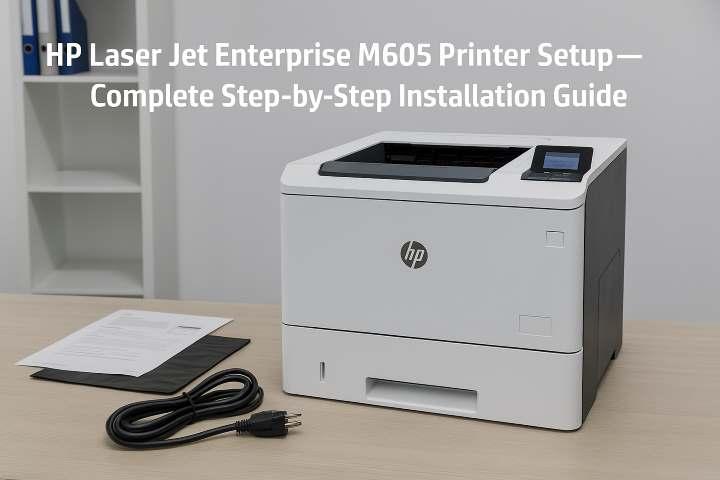
Begin your HP LaserJet Enterprise M605 printer setup by unboxing the device carefully. Place the printer on a stable, level surface capable of supporting its weight. The M605 is built to last, so proper placement ensures stability during operation.
Remove all packing materials, including tape, protective covers, and inserts from trays and compartments. Check thoroughly, as leftover materials can cause jams or misfeeds. Position the printer in a location with adequate ventilation, avoiding heat sources or cramped spaces, which helps maintain consistent performance.
Powering On and Initial Configuration
Connect the printer to a reliable power source and press the power button. The first startup may take a few moments as the printer initializes. Use the control panel to configure:
-
Language
-
Region
-
Date
-
Time
These initial settings are crucial, as they affect system logs, scheduled tasks, and print job timestamps. Accurate configuration ensures smooth operation in both single-user and networked environments.
Installing the Toner Cartridge
Open the top cover to access the toner compartment. Take the toner cartridge and slide it gently into its slot, ensuring proper alignment. Avoid forcing it, as improper installation can cause printing errors or damage the printer.
Close the cover and allow the printer to calibrate automatically. This step is essential for even toner distribution and high-quality output. Proper cartridge installation is the key to consistent print results.
Loading Paper Correctly
Paper loading may seem simple, but precise handling prevents jams and misfeeds.
-
Pull out the main paper tray.
-
Adjust the sliders to match the size of your paper.
-
Place the stack neatly, avoiding bent corners or curled sheets.
-
Push the tray firmly back into the printer.
Confirm the paper size and type on the display. Proper paper handling ensures smooth printing and extends the life of the printer’s components.
Connecting the Printer to a Network
The M605 supports both wired and wireless network connections, making it versatile for any office setup.
Wired Connection (Ethernet)
-
Connect an Ethernet cable to the printer.
-
The printer automatically receives an IP address from the network.
-
Confirm connectivity by printing a network configuration page.
A wired connection provides stable, uninterrupted printing, ideal for high-volume environments.
Wireless Connection (Wi-Fi)
-
Access Network Settings from the control panel.
-
Select Wireless Setup.
-
Choose your Wi-Fi network and enter the password.
-
Confirm the connection.
Print a network summary page to record the printer’s IP and network details, useful for troubleshooting or future configurations.
Accessing the Embedded Web Server (EWS)
The HP M605 features an embedded web server, allowing advanced configuration through a web browser.
-
Obtain the printer’s IP address from the control panel.
-
Enter the IP into a browser to access the EWS dashboard.
Within the EWS, you can manage:
-
Print defaults and preferences
-
Tray assignments
-
Security settings
-
Usage tracking
-
Energy-saving features
This gives full control over the printer’s performance and ensures optimal efficiency in multi-user environments.
Configuring Print Preferences
Customizing print preferences is essential for professional output:
-
Set default print quality.
-
Enable duplex printing to save paper.
-
Adjust paper type and density.
-
Assign tasks to specific trays.
-
Configure warm-up and sleep timers.
Proper preference setup minimizes errors and ensures consistent results across different print jobs.
Running a Test Print
Once configuration is complete, run a test page to verify printer performance. Check for:
-
Clear and sharp text
-
Correct alignment
-
Even toner distribution
-
Absence of smudges or streaks
If issues appear, adjust the relevant settings. Test printing confirms that the setup is complete and the printer is ready for daily use.
Utilizing Advanced Features
The HP LaserJet Enterprise M605 includes advanced features that enhance productivity:
-
Secure Printing: Protect sensitive documents with PIN release.
-
Energy-Saving Mode: Reduce electricity usage without affecting speed.
-
Usage Monitoring: Track print volume and detect maintenance needs.
-
Automatic Duplexing: Save paper while maintaining output quality.
-
Custom Tray Assignments: Assign trays for specific tasks or paper types.
These capabilities optimize the printer for modern office workflows and reduce manual intervention.
Regular Maintenance for Long-Term Reliability
Routine maintenance ensures consistent performance and extends printer life:
-
Clean the exterior and paper trays regularly.
-
Inspect rollers for wear and replace if needed.
-
Replace toner cartridges promptly.
-
Use quality paper to prevent jams.
-
Run calibration and cleaning cycles periodically.
-
Monitor logs for errors or unusual activity.
Proper maintenance reduces downtime and keeps the M605 operating at peak performance.
Troubleshooting Common Issues
Even with careful setup, minor problems can occur. Common solutions include:
-
Paper Jams: Remove debris, check tray alignment.
-
Network Issues: Verify IP address and Wi-Fi credentials.
-
Print Quality Problems: Recalibrate toner, clean rollers.
-
Error Messages: Check the EWS dashboard for guidance.
Following these steps ensures minimal disruption and reliable performance.
Final Thoughts: Why Proper Setup Matters
The HP LaserJet Enterprise M605 Printer Setup is more than just installing hardware—it’s about creating a foundation for reliable, high-quality, and efficient printing. Proper setup ensures:
-
Consistent professional-quality prints
-
Reduced downtime and fewer errors
-
Optimized network connectivity for multi-user offices
-
Extended printer lifespan through careful handling
-
Streamlined workflows with advanced features
Taking the time to set up your M605 correctly—from unboxing, installing toner, and loading paper to network configuration and test printing—pays off in the long run. A well-configured printer doesn’t just work; it becomes a dependable partner in the office, ready to handle high-volume printing tasks with efficiency and precision.
Join our community to interact with posts!