

Let me be straight with you. Bread baking proofing is the thing that makes or breaks a loaf, and almost nobody explains it well. I ruined maybe thirty loaves before it clicked. Flat, gummy, dense enough to prop a door open. The recipe said "let rise until doubled" and I did exactly that, and still got bricks. The problem is that proofing isn't a timer thing. It's a dough thing. Your kitchen, your flour, your yeast, even the weather outside, they all change how fast things move. Once you stop trusting the clock and start trusting your eyes and fingers, bread gets way less stressful. Honestly, way more fun too.
What Is Proofing, Actually?
Proofing is just the final rest your shaped dough gets before it hits the oven. People mix it up with the first rise, which is bulk fermentation, and that's a different stage. During proofing, the yeast keeps eating sugars and pushing out gas, and the gluten stretches to hold it in. Flavor develops too, which people forget. A short proof gives you a bland, tight loaf. A long, slow one gives you that tangy, complex crumb you pay six dollars for at the bakery. So you're really balancing two things at once: structure and taste. Miss either one and the bread tells on you.
So, How Long Does It Really Take?
Here's the annoying answer, it depends. At a warm room temperature, around 24 to 26 degrees Celsius, most yeasted doughs proof in about 45 minutes to 90 minutes. A rich dough with butter and eggs, like brioche, needs longer because fat slows everything down. Sourdough is slower again, sometimes three or four hours, sometimes overnight in the fridge. If your kitchen is cold, add time. Hot summer day, cut it down and watch closely. I've seen dough overproof in thirty minutes in July here in India. So use the time in the recipe as a rough guide, nothing more. Your dough decides when it's ready, not the printed number.
The Poke Test Nobody Skips (Or Shouldn't)
This is the best trick I know. Flour a finger, press it gently into the dough about a centimeter deep, and watch. If the dent springs back fast and completely, it needs more time. If it fills back slowly, only partway, you're in the sweet spot, go bake it. If the dent just stays there and the dough feels like a sad wet balloon, you've gone too far. That's overproofed. It takes a few tries to read it, and you'll get it wrong at first, I did. But after five or six loaves your fingers just know. It's honestly better than any gadget you can buy.
Temperature Is Doing More Than You Think
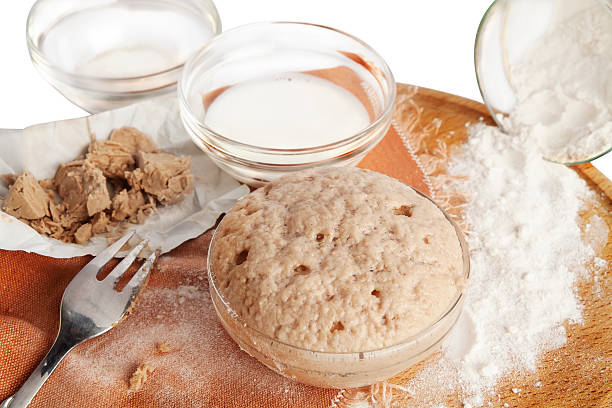
Yeast is lazy when it's cold and wild when it's hot. Around 27 degrees it's happy. Below 18, it crawls. Above 32 or so it races, and the dough can turn sour and weak before you've even preheated the oven. If your house is chilly, put the dough in the oven with just the light on, or next to a warm kettle in a closed cupboard. A bowl of hot water on the shelf below works too. In summer, do the opposite, move it somewhere cooler or use the fridge. Water temperature when mixing matters as well. Starting warm or cool at the beginning changes everything later down the line.
Overproofed vs Underproofed, Know the Difference
An underproofed loaf is dense, tight, with a pale crumb and often a big weird tear on one side where it burst in the oven. The gas didn't build up enough so the oven spring went crazy trying to catch up. An overproofed loaf is the opposite problem. It rises nicely, then collapses when you slash it or put it in the oven, leaving a flat top and a sour, almost boozy smell. The crumb looks gummy and big-holed in the wrong way. Both are fixable next time. Underproofed? Wait longer. Overproofed? Shorten it or cool the dough down. Write the times on a sticky note, seriously.
The Fridge Method (Cold Proofing)
Cold proofing is my favorite cheat. You shape the dough, cover it, and slide it into the fridge for anywhere between 8 and 16 hours. The cold slows the yeast down so flavor builds without the dough blowing up. And it's flexible, which matters. You can bake in the morning with zero stress, no hovering over a bowl. Bonus, cold dough is much easier to score cleanly. Bake it straight from the fridge, no need to warm it up first. Just add a couple minutes to the bake. Some people say it's only for sourdough but that isn't true, regular yeasted loaves do great with it too.
Gear That Actually Helps You Proof Better
You don't need a hundred gadgets. But a few things really do help, and this is where decent bread baker supplies earn their spot in your kitchen. A banneton basket gives sourdough its shape and holds the dough up while it rests. A bench scraper makes shaping less messy. A dough thermometer takes the guessing out of temperature, and a clear, straight-sided container lets you actually see the rise. Even a simple shower cap works over a bowl, sounds silly, works great. Abioto Baking and other small shops carry this kind of stuff without the crazy markup, so shop around a bit before buying the fancy kit.
Flour, Hydration, and Why They Change the Clock
Not all flour behaves the same. Whole wheat ferments faster because it has more nutrients for the yeast to chew on, but it also has sharp bran bits that cut gluten strands, so it gives less lift. Bread flour holds gas better thanks to higher protein. Wetter doughs usually proof faster and feel looser, while stiffer doughs take their time. So if you swap flours and suddenly your usual hour doesn't work, that's not your fault, it's chemistry. Keep notes. Seriously, a scrappy notebook next to your oven will teach you more about bread baking proofing than three YouTube videos combined, I'm not joking about that.
Common Mistakes I See All the Time
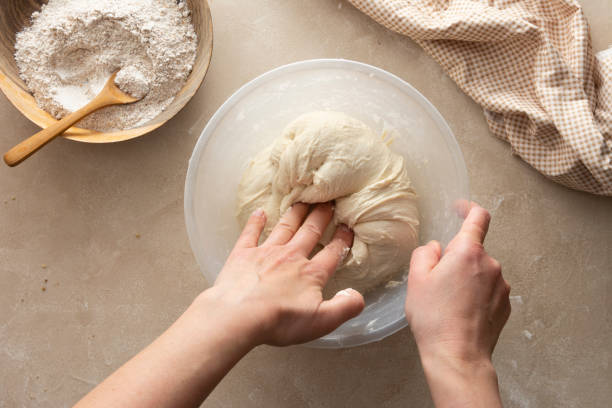
Number one, rushing. People get impatient and bake early, then blame the recipe. Number two, using dead yeast. Check the date, or test it in warm water with a pinch of sugar first. Number three, too much flour while shaping, which makes a tight skin that stops the dough expanding. Number four, covering the dough badly so it dries out and forms a crust. A damp towel or plastic wrap fixes that. And number five is skipping the poke test completely. Everyone wants a magic rule, but dough is alive, and it has moods. Treat it like a person, a slightly stubborn one.
Fixing a Proof That Went Wrong
Mistakes happen, so don't bin the dough just yet. Overproofed dough can often be rescued. Gently degas it, reshape it quickly, and give it a short second proof, maybe twenty minutes. It won't be perfect but it'll be edible, sometimes really good. Or roll it flat for focaccia or pizza, which forgive almost anything. Underproofed is easier, just wait and keep checking. If a loaf comes out dense anyway, slice it thin and toast it, or turn it into breadcrumbs and croutons. Nothing wasted. And honestly the failed loaves taught me more than the pretty ones ever did, so don't feel bad about them.
Final Thoughts
Proofing feels mysterious until it doesn't. Learn the poke test, watch your temperature, and keep a few notes on what worked. Buy a couple of decent tools, but don't go overboard, since skill matters more than gear. Your first few loaves might be rough, mine were, and that's completely fine. Bake often, pay attention, and trust your hands over the clock. One day you'll pull a golden, springy, crackly loaf out of the oven and think, huh, I actually did that. That feeling is the whole reason people keep baking bread at home.
 English
Join our community to interact with posts!